The following settings override the respective default values set by the email styles, including the custom CSS.
Table of Contents
- Default Settings
- Buttons
- Blockquotes
- Dividers
- Headings and Paragraphs
- HTML
- Images
- Social Profiles
- Share Blocks
- YouTube
- Curations
Setting defaults for all new blocks
1. On the left panel select newsletter.

2. Select Styles.

3. You can set defaults for Desktop width, Mobile width, Block, Divider, Text and image.


Note: The breakpoint (maxMobileWidth) can affect the look of promotions. The default is 350px. Beyond 800px, a two-column promotion may shift to a top-bottom layout based on screen size.
4. Set your default text in the newsletter.

5. Set your default image alignment in the newsletter.

6. Set your default divider style in the newsletter.

7. Set your default button style in the newsletter.

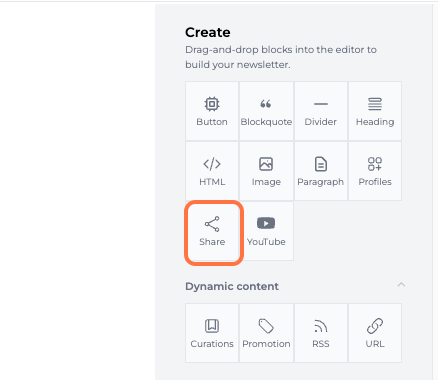
Add a Button block
1. Drag and drop the button block.

2. You can add a URL to link the button to a web address.

3. You can adjust the button color, text color, alignment, and border radius.

4. You can adjust your button border.

5. You can customize the color of the button, text, border, background, and font.
Clicking on the color opens a panel of colors and a color picker option. Click on the line next to save to open additional color options. Opening the color picker allows you to manually select a color. You can also toggle between the following to select the color: RGB, HSL, or HEX. You can save changes to color choices.
- These color options will apply to all blocks where color can be used.


6. You can customize the style of the font.

7. You can apply all or individually set padding values.

Add a blockquote block

2. You can change the left border color.

3. You can modify the border.

4. You can customize border colors.
Clicking on the color opens a panel of colors and a color picker option. Opening the color picker allows you to manually select a color. You can also toggle between the following to select the color: RGB, HSL, or HEX. You can save changes to color choices.

5. You can also customize the background and text color.

6. You can modify your font style.

7. You can apply all or individually set padding values.

Add a divider block
1. Drag and drop the divider block.
2. You can adjust the divider color, thickness, and style.

3. You can adjust the border of your divider.

4. You can customize the divider color, border, and background.
Clicking on the color opens a panel of colors and a color picker option. Opening the color picker allows you to manually select a color. You can also toggle between the following to select the color: RGB, HSL, or HEX. You can save changes to color choices.

5. You can apply all or individually set padding values.

1. Click on newsletters.

2. Click on a blank template.

3. Drag and drop to add a heading or paragraph.

4. If you selected heading, here you can adjust your heading preference from the heading type.
- From the dropdown menu, you can select from H1, H2, H3, H4, H5, and H6 heading types. You can now update the font size for your header.


5. There's a "customize your block" setting under both the heading and paragraph block.

6. The ability to adjust the border color, thickness, and style is available for both the heading and paragraph.

7. You can adjust the font type and size.
- The fallback font takes into effect if the primary font is not supported by the email client.

8. You can adjust the alignment.

9. You can customize the background and text color.

Clicking on the color opens a panel of colors and a color picker option. Here you can manually select a color. The carrot to the right of RGB allows you to toggle between the following to select the color: enter RGB, HSL, or HEX of the color. You can save your changes to color choices.

11. You can apply all or individually set padding values.

Add an HTML block


Add an image block
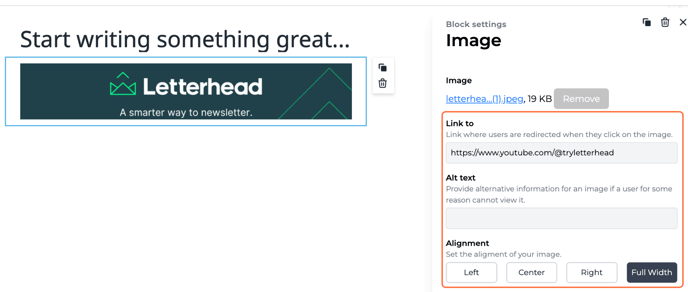
1. Drag and drop an image block.

2. Choose your image
- If you are updating an existing image you will see a remove button. Remove the previous image and choose a new one.

3. You can add a link to where users are going to be redirected when they click on the image, add alt text if they are unable to view the image, and align your image.
4. You can adjust the look of the border for the image.

5. You can customize the color of the border and background of the image block.
Clicking on the color opens a panel of colors and a color picker option. Here you can manually select a color. The carrot to the right of RGB allows you to toggle between the following to select the color: enter RGB, HSL, or HEX of the color. You can save your changes to color choices.

6. You can adjust the padding by applying all or individually setting padding values.

Add a profile block
1. Drag and drop to add profiles block.

2. Enter the URLs of social profiles you would like to share.

3. Drag profiles to reorder.

4. You can change display to show profile names or icons of profiles

5. In this drop-down menu you can change the color of the profile icons.

6. You can adjust the alignment.

7. You can add a border.

8. You can customize the border and background color of the profiles block.
Clicking on the color opens a panel of colors and a color picker option. Here you can manually select a color. The carrot to the right of RGB allows you to toggle between the following to select the color: enter RGB, HSL, or HEX of the color. You can save your changes to color choices.

9. You can adjust the padding.
- You can apply all or set individual values for the padding.

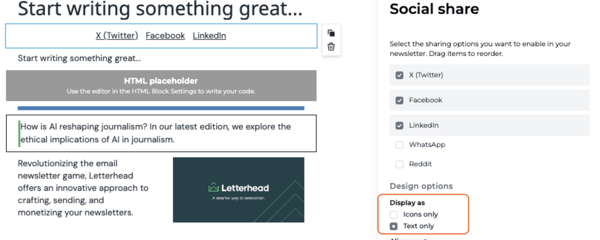
Add a share block
2. Select the share options you want to enable in your newsletter.
- Drag items to reorder.

3. You can change the display to show text only or icons only.
4. You can adjust the alignment.
5. You can change the border style.

6. You can change the font style.

7. You can customize the border, background, and text color.
Clicking on the color opens a panel of colors and a color picker option. Opening the color picker allows you to manually select a color. You can also toggle between the following to select the color: RGB, HSL, or HEX. You can save changes to color choices.

8. You can apply all or individually set padding values.

Add a YouTube block
1. Drag and drop to add a YouTube block.

2. Add your video's URL.

3. You can add a thumbnail and overlay the thumbnail with a play button.

4. You can easily adjust the alignment and width.

5. You can add a border to your YouTube video.

6. You can customize both your border and background color.
Clicking on the color opens a panel of colors and a color picker option. Here you can manually select a color. The carrot to the right of RGB allows you to toggle between the following to select the color: enter RGB, HSL, or HEX of the color. You can save your changes to color choices.

Add a curation block
1. Drag and drop curated curations block.
2. Add keywords from your curated article to the search.

3. Select the source of the curation from the multiselect source list.

4. If you added a tag to your curated content you can your tags here from the multiselect tag list.

5. Select the layout for your curation.

6. Click load to add your curation to the newsletter.

7. You can change the font of the curated content.

8. You can customize the border, background, and font color.
Clicking on the color opens a panel of colors and a color picker option. Opening the color picker allows you to manually select a color. You can also toggle between the following to select the color: RGB, HSL, or HEX. You can save changes to color choices.

- Choose how you want to display the title, excerpt, date, source, and author.
