Learn how to build a new edition of your newsletter by using an activated template.
⚠️ For a Template to appear in your Template gallery, it must be created in the Template's tab and "Activated."
- To begin, go to the Newsletters screen by clicking on the Newsletters menu option on the left hand side panel.

- Select and click on the template you wish to use for creating your newsletter.
-
- Note: Your template must be built and activated in the "Templates" dashboard

- Note: Your template must be built and activated in the "Templates" dashboard
-
- Step 1 of 3: Create, During this step, you have the option to select any of the blocks on the right and easily place them wherever you want them to appear in your newsletter. Simply click on the desired block and drag it to the desired location.
- After dragging a block to your desired location, simply click on the placeholder to access the block settings on the right and make any necessary edits.
- Step 1 of 3: Preview and schedule. During this stage, you will be creating your newsletter edition and adding your content. Once you have finished, simply click on the Preview and schedule button to proceed.

- Step 2 of 3: Preview and schedule. On this page, you are presented with a preview of your newsletter and you can send yourself or anyone else a test version of your email by clicking 'Send a Test Email', to see how the newsletter looks like before you schedule it.


- In addition to sending a test email, on this screen's right panel, instead of the composer blocks, you will see different a couple of different fields.

- Email Subject: by default each new edition has a default subject, and you can update it at this point.
- Preview text: this is a required field and you can add a snippet of what your newsletter is about. This allows you to control the preview text email clients display.
- Audience: You can select who will receive your newsletter, either your entire audience, which are those members with a status of Subscribed, or a specific segment.
- Date: select the date for your newsletter to go out.
- Time: select the time for your newsletter to go out.
- Social preview: You have the option to choose an image, title, and preview text that will appear as a preview when you or your readers share your newsletter on social media. This allows you to create an attractive and attention-grabbing preview that will entice readers to click and engage with your edition.
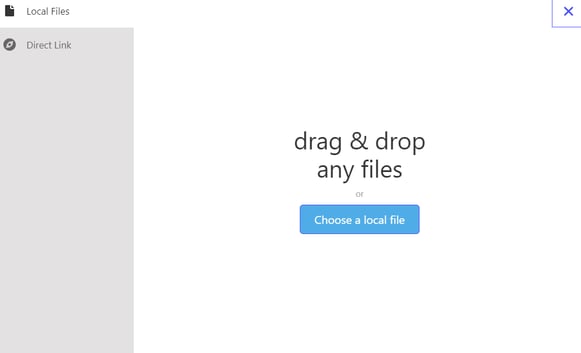
- When choosing your image make sure to click on Local Files or Direct Link to update the default image.

- When choosing your image make sure to click on Local Files or Direct Link to update the default image.
- When everything is all set, click Save and schedule.

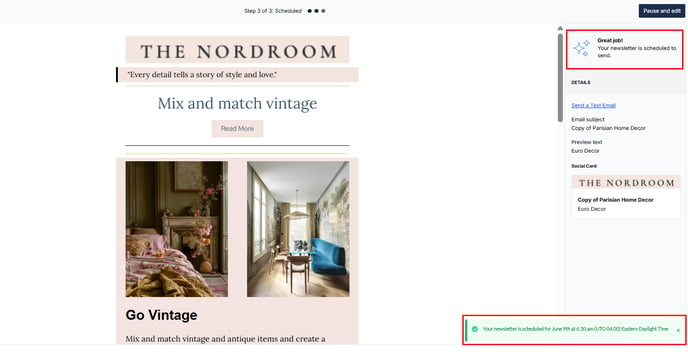
- Step 3 of 3: Once scheduled, a message will appear on the lower right of the screen showing the date and time you selected when scheduling the newsletter.


Need Help?
If you have questions or need assistance, please contact our support team at support@tryletterhead.com or log a support ticket through the Help Center!
