Tags help you organize your contacts into groups based on interests, topics, or any other category you choose. Once your contacts are tagged, you can create segments using one or more tags. Then, when you're in the newsletter editor, you can select a specific segment to send your newsletter to, making it easy to target the right message to the right audience.
How to create tags:
- Click Audience
- In the drop down, click Tags

Note: Tags cannot contain spaces. Dashes must be used instead, e.g.,"VIP-Guest-List".
- Click the Create tag button
- Enter the name of the tag in Name field
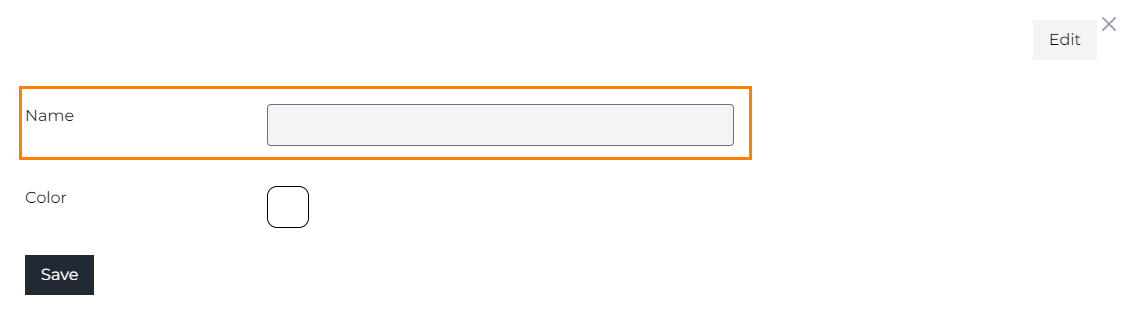
- Click Color and select the of the tag
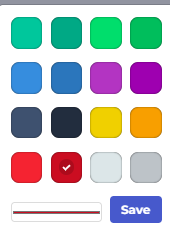
- Hit Save
How to tag audience members individually:
- In your Audience table, select the audience member
- Click Edit Tags
-
Click on the dropdown to search and select tags

- Hit Save
How to tag bulk tag audience members:
-
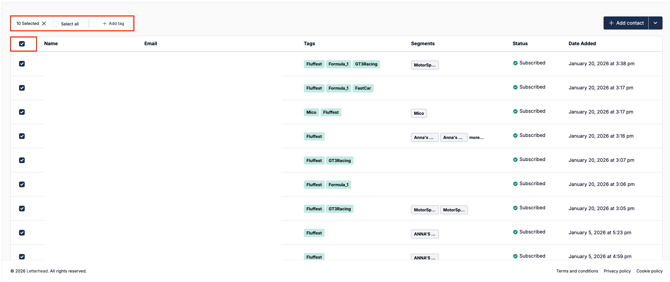
Navigate to the Audience page within any channel.
-
Use the checkboxes to select individual audience members, or use the checkbox in the table header to select all audience members on the current page.
-
Above the table, review the number of audience members selected. From here, you can also check Select all to select all audience members, not just those on the current page.
-
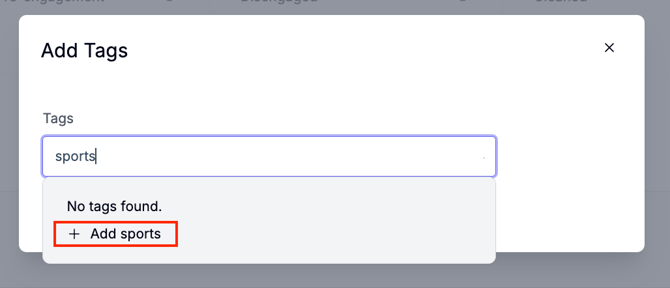
Once you’re satisfied with your selection, click + Add Tag.


-
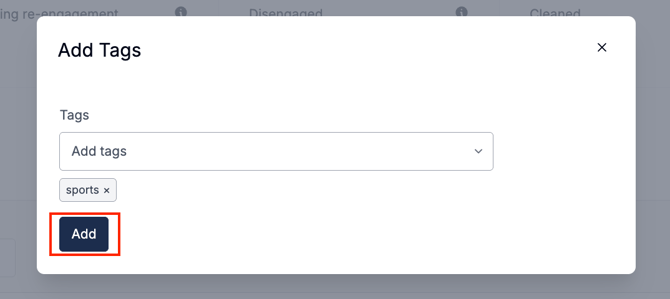
 In the modal, select one or more existing tags to apply.
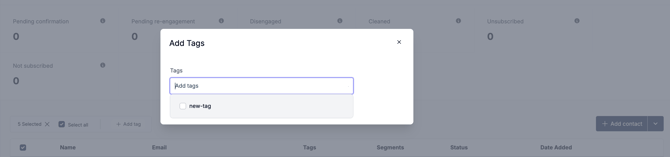
-
To create a new tag, type the tag name, create it, and include it in your selection. Note: Tags cannot contain spaces. Dashes must be used instead, e.g.,"VIP-Guest-List".
-
Click Add to apply the tags to all selected audience members.
How to create segments:
Segments allow you to group subscribers based on specific criteria such as tags or profile fields.
-
Click on Segments under the Audience dropdown
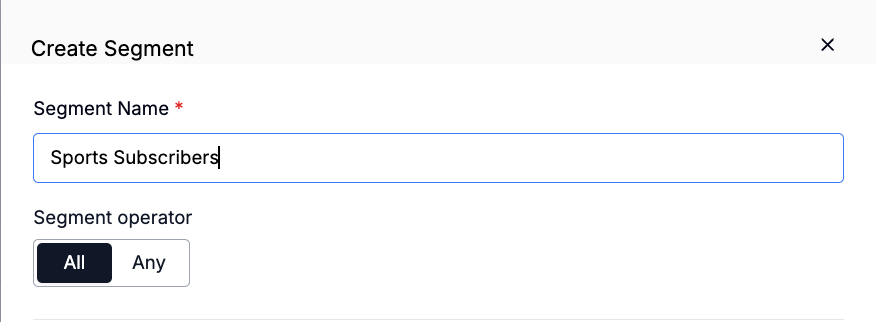
- Click the Create segment button
- Enter the name in Segment name field
- Choose a Segment Operator : select how multiple criteria should be evaluated:
- ANY Segment Operator
Subscribers will be included if they match any of the criteria.
Example:
Tags IN Sports OR Fitness OR Gym
OR
Profile Field (Custom Field) = Sports Enthusiast - ALL Segment Operator
Subscribers must match all criteria to be included.
Example:
Tags IN Sports
AND
Profile Field (Custom Field) = Sports Enthusiast
- ANY Segment Operator
- Select the tag conditional : Choose whether subscribers should be:
- IN (have the specified tag), or
- NOT IN (do not have the specified tag)
- We also have the option to filter using a profile field
- Select the name of the profile field

- Select the conditional (equals to, distinct of, contains, or does not contain)
- Enter the value of the profile field
- Select the name of the profile field
- Click on Save
Please note: segment counts are not real-time. It can take up to 3 hours to update. That said, even if the count hasn’t updated yet, you can still send to the segment, and it will include all the correct subscribers at the time of send.
To send your newsletter to a specific segment or assign a segment to a template:
- Once you're done creating or updating the draft newsletter, click Preview and schedule
- In Step 2, the Activation page for Templates, you will see an Audience dropdown. Once you click on it, all your segments will load with the latest segment counts in the app.

- Select the audience for the newsletter
- Fill out the remaining fields
- Click on Activate
1. What’s the difference between a tag and a segment?
-
Tags are simple labels you apply to individual subscribers to help categorize them—for example, “Dog Lovers” or “Paid Members.”
-
Segments are dynamic groups you create based on tags and other filters. For instance, you might build a segment like: subscribers tagged “Dog Lovers” and who opened last week’s newsletter. Segments let you target more specific subsets of your audience.
2. Can I combine multiple tags in one segment?
Yes. You can include multiple tags within a single segment and choose how they’re evaluated using ANY or ALL logic.
-
ALL: Only subscribers who have all selected tags will be included.
If a subscriber is missing even one of the tags, they won’t be part of the segment. -
ANY: Subscribers who have any of the selected tags will be included.
They only need to match one of the tags to qualify.
This gives you flexibility to create either highly targeted segments (AND) or broader audience groups (OR), depending on your use case.
______________________________________________________________________________________________
Need Help?
If you have questions or need assistance, please contact our support team at support@tryletterhead.com or log a support ticket through the Help Center!