- Click on Newsletters on the main navigation

- Select the draft newsletter you want to update the image
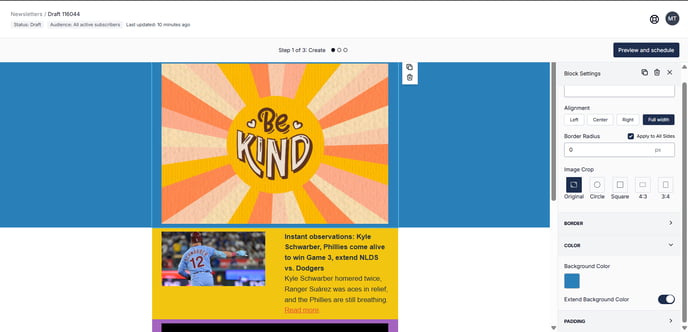
- On the newsletter, click the existing image
- The Image Block settings appear in the slideout on the right of your screen.

- Click the name of the image or Remove image
- If you want to change the image, select the name of image
- Choose the image you want to add. You have the option to add image from Local files or Direct Link
- Make any adjustments and click Add

- After uploading your image, you can customize how it appears in your newsletter using the Block Settings panel.
Link to
You can make your image clickable by adding a URL in the Link to field. When subscribers click the image in your newsletter, they’ll be taken to the link you entered.

Alt Text
Use the Alt Text field to describe your image. This text helps with accessibility and appears if the image fails to load. It’s also useful for SEO and for readers using screen readers.

Alignment
Choose how you’d like the image to be aligned within your block:

-
Left – Aligns the image to the left side of the block.
-
Center – Centers the image within the block.
-
Right – Aligns the image to the right side of the block.
-
Full width – Expands the image to the full width of the email container.
Border Radius
Adjust the Border Radius to round the corners of your image. Enter a pixel value (e.g., “10”) and check Apply to All Sides if you want the same radius on all corners.

Image Crop
You can crop your image into different shapes or aspect ratios:

-
-
Original – Keeps the image’s original dimensions.
-
Circle – Crops the image into a circular shape.
-
Square – Makes the image a perfect square.
-
4:3 – Crops the image to a 4:3 aspect ratio.
-
3:4 – Crops the image to a 3:4 aspect ratio.
-
Border
You can customize your image’s border to match your newsletter’s design.

Border Color
Select a color for your image border by clicking the color swatch. This lets you choose from the color picker or enter a specific hex color code.
Border Size
Use this setting to adjust the thickness of your image border. Enter the value in pixels (px).
Check Apply to All Sides if you want the same border width on all sides of the image.
Style
Choose how the border appears:
-
Solid – A continuous line around the image.
-
Dashed – A series of short dashes.
-
Dotted – A line of small dots.
Color
You can adjust the color settings of your image block to better fit your newsletter’s design.

Background Color
Click the color box to choose a background color for your image area. You can select from the color picker or enter a specific hex code. This color appears behind your image, which can help it stand out or match your newsletter’s color theme.
Extend Background Color
Toggle this option on to extend the selected background color across the full width of the section. This creates a seamless background effect that spans the entire content area.
Padding
Padding controls the amount of space between your image and the edges of its container. Adjusting these values can help create visual balance and spacing consistency in your newsletter design.
Adjusting Padding
You can customize the padding for each side Top, Right, Bottom, and Left by entering a pixel value in each field.
This allows for precise control over how much space surrounds your image.
Apply to All Sides
Check this box if you want the same padding value applied uniformly to all four sides. This is useful for maintaining equal spacing around your image.
Need Help?
If you have questions or need assistance, please contact our support team at support@tryletterhead.com or log a support ticket through the Help Center