
Learn how to create and schedule promotion at the channel level (for one newsletter/account only)
-
Click Promotions
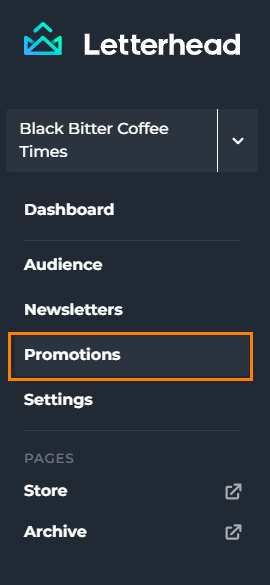
- On the upper right of the screen, select Promotions

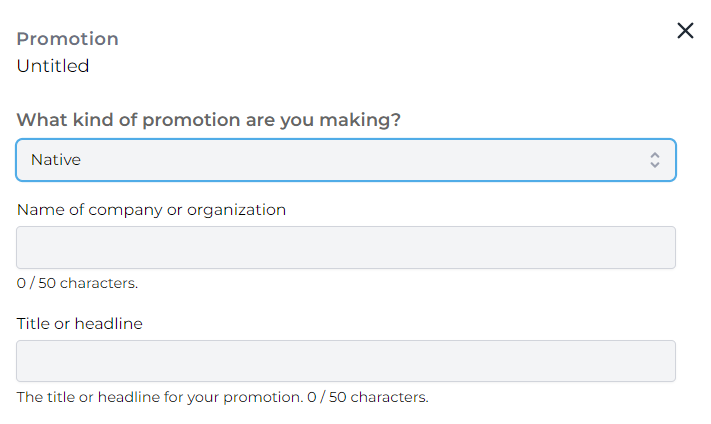
- Click the Add Promotion button
- Select the type of promotion in the dropdown and enter all the information
- There's an option to add images in some of the promotions
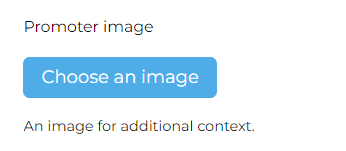
- There's an option to add images in some of the promotions
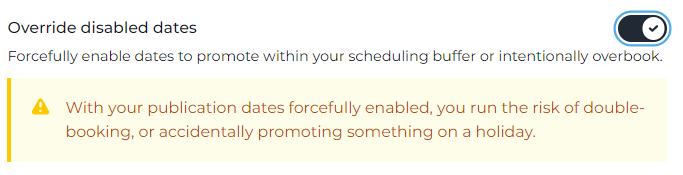
- As a newsletter administrator, you may choose to override the disabled dates in your calendar by selecting the Override disabled dates option
- Select the Promotion date

- Tick the agreement and click Submit

- Your newly created promotion can be found on the promotions page
- If you want to make changes, click the promotion
- Click the pencil icon to edit

- You can only modify the date, Name of the company or organization, Override disabled dates, and Promotion date, regardless of the status.

-
Tick the agreement and click Update