In Letterhead, you can add a background image at three different levels:
- On an individual letter — applies to just that one send.
- On a template — applies to every letter created from that template going forward.
- On a single section/block — applies to one content block, not the whole email. Works in both letter and template editors.
The control is the same in each place — just open the editor for whichever thing (letter, template, or block) you want to change and find the Background Image setting.
Before you start
Have your image ready. A few things to keep in mind:
- File type: JPG, PNG, or GIF.
- Size: Keep it under ~1 MB so emails stay snappy.
- Dimensions: Match your newsletter's Desktop Width (set in the Styles tab, default 640 px) for the cleanest result.
- Contrast: Make sure your body text will still be readable on top of it.
You can also use a hosted image from the web — you'll just need its direct URL.
Option 1: Add a background image to one letter
Use this when you want a background image on a single send — for a seasonal issue, a sponsored edition, or any one-off look that shouldn't carry into future letters.
Step 1: Open the letter
From the workspace dashboard, click into the channel that contains the letter. In the channel sidebar, click Newsletters. Either pick an existing draft from the All Newsletters list, or click a template tile under Create a Newsletter to start a new letter from that template.
Step 2: Open the Styles panel
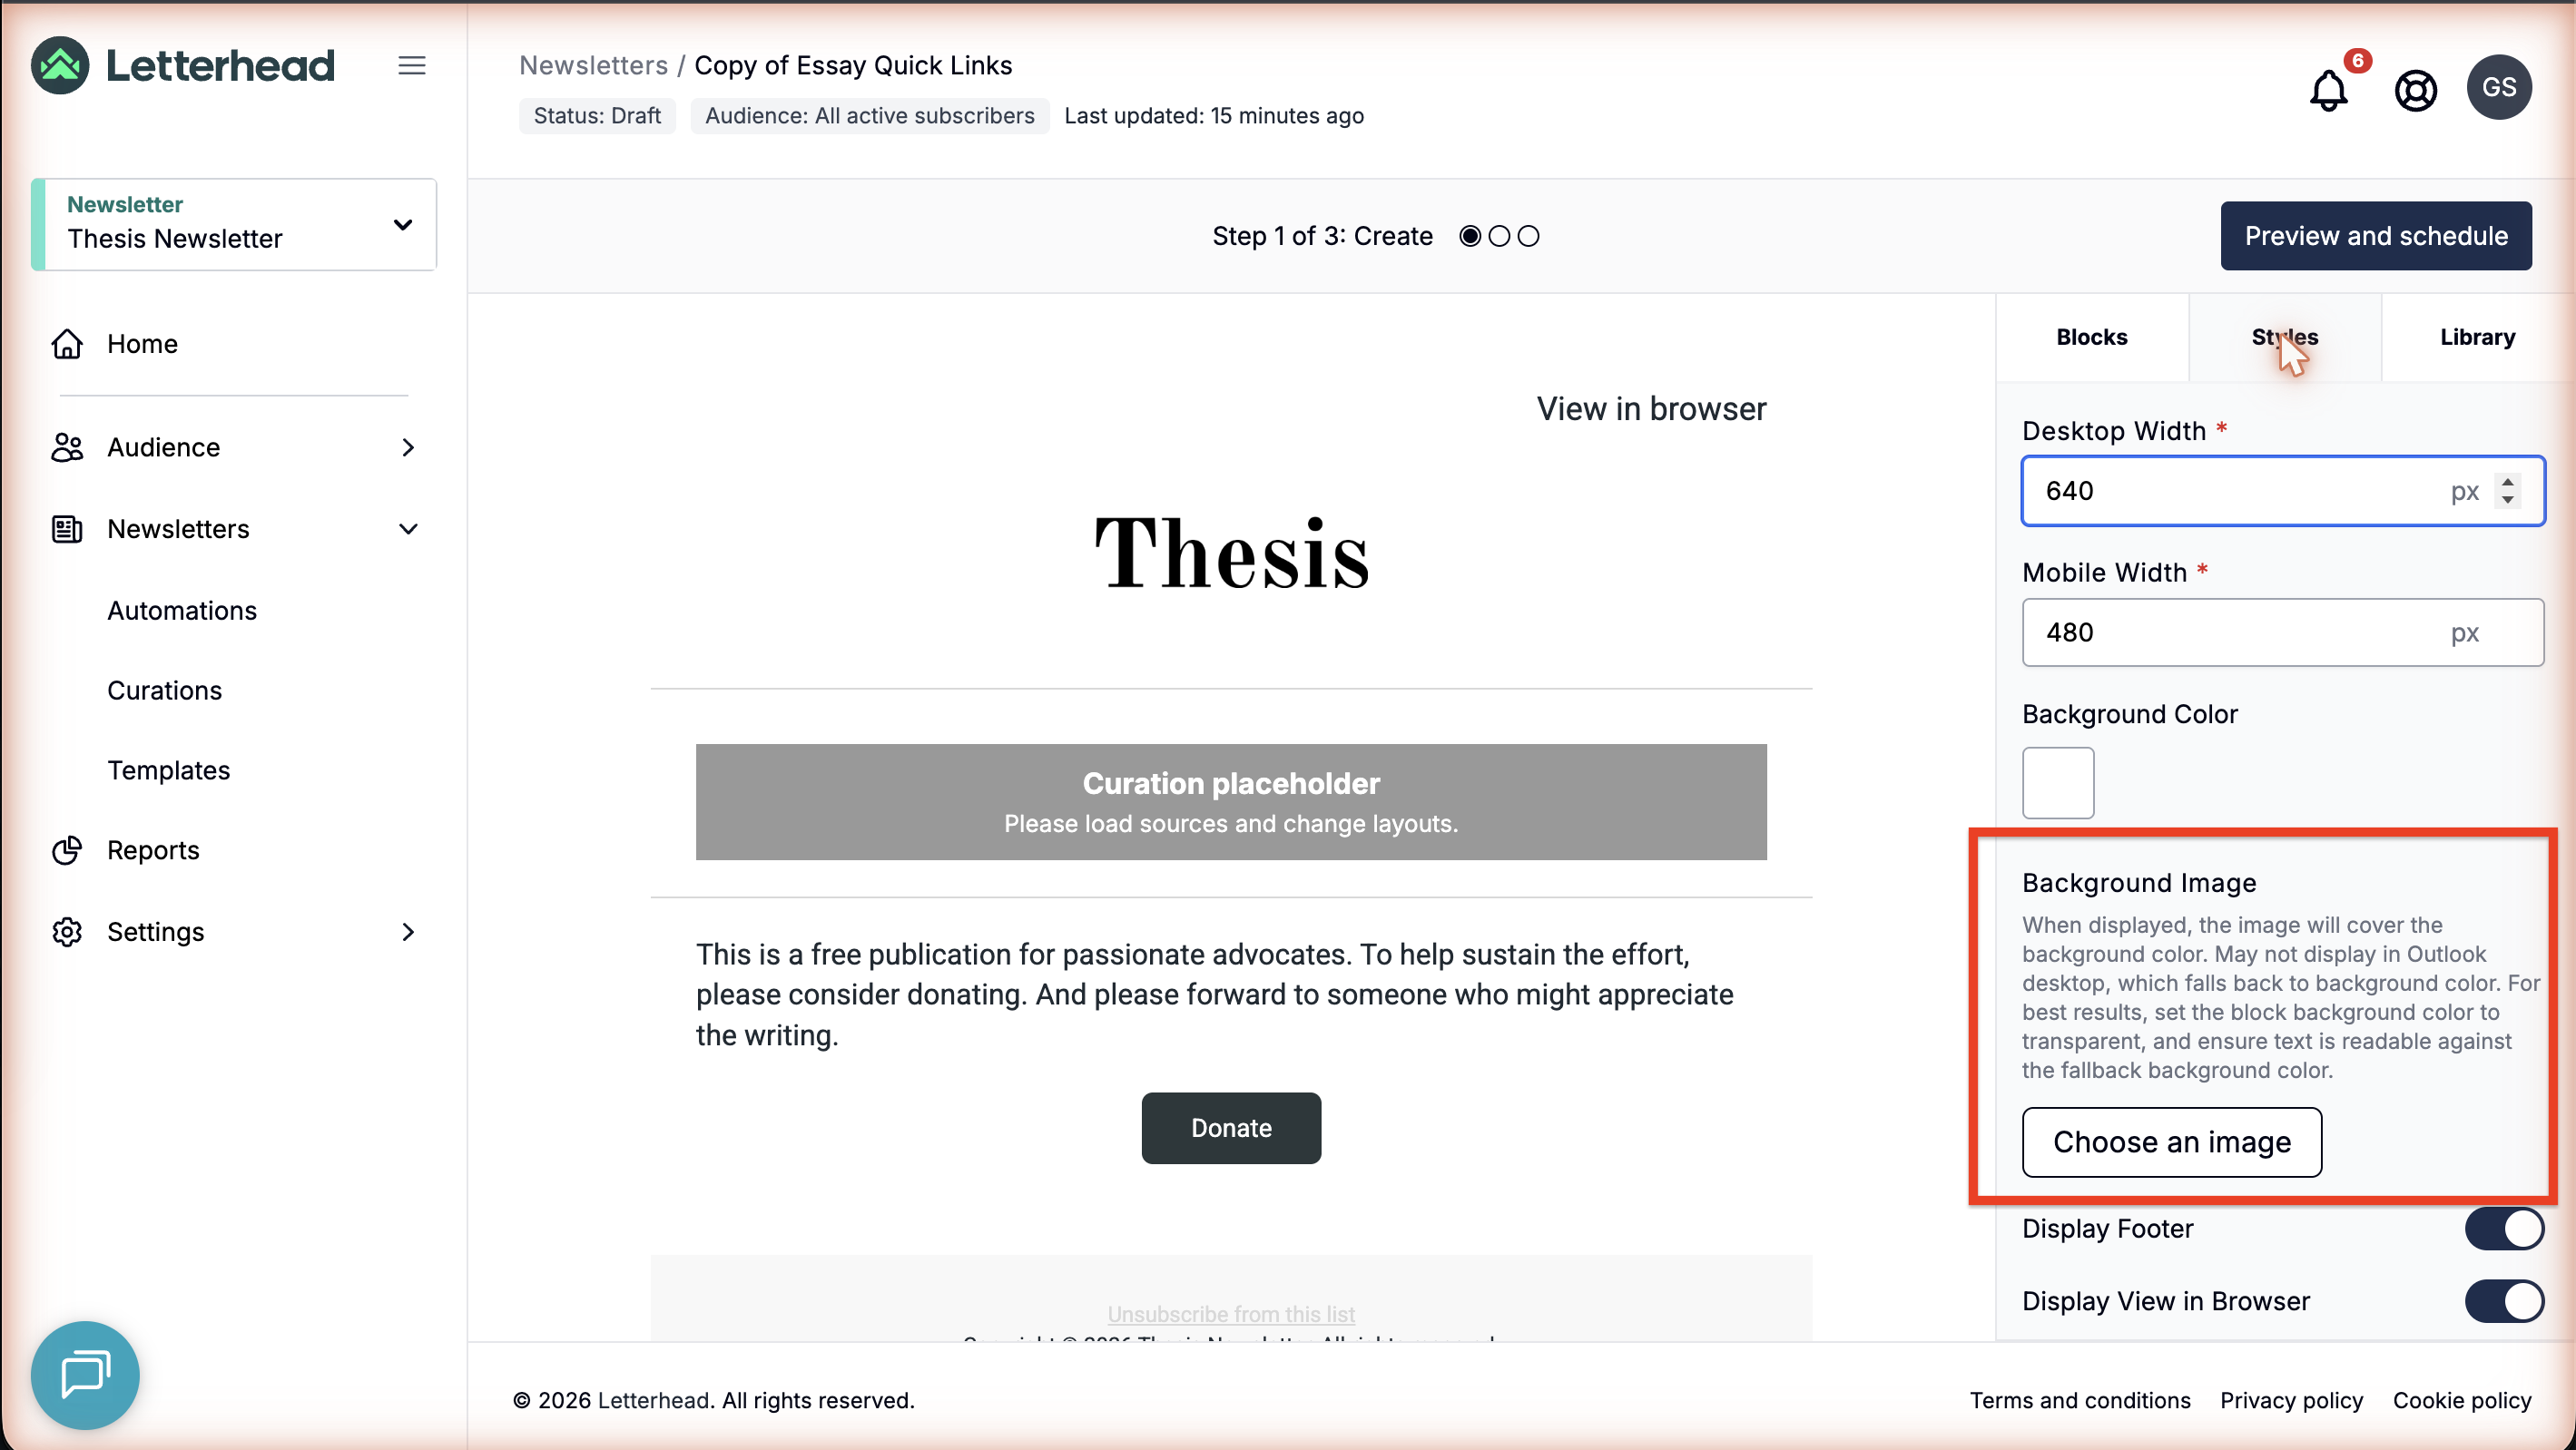
In the letter editor, the right-hand panel has tabs labeled Blocks, Styles, and Library. Click Styles.
Step 3: Find the Background Image section
Inside the Styles panel under EMAIL STYLES, scroll past Desktop Width, Mobile Width, and Background Color. The Background Image section sits below them, with a short description and a Choose an image button.
Step 4: Upload your image
Click Choose an image and either upload from your computer (Local Files) or paste a URL (Direct Link) — see "Upload options" below for screenshots of both. The picker closes when the image uploads, and your letter preview refreshes with the new background.
Save the letter when you're done — the background image is now part of just this letter.
Option 2: Add a background image to a company template
Use this when you want every letter created from a template to inherit the same background image — a permanent piece of your brand look.
Step 1: Open the template
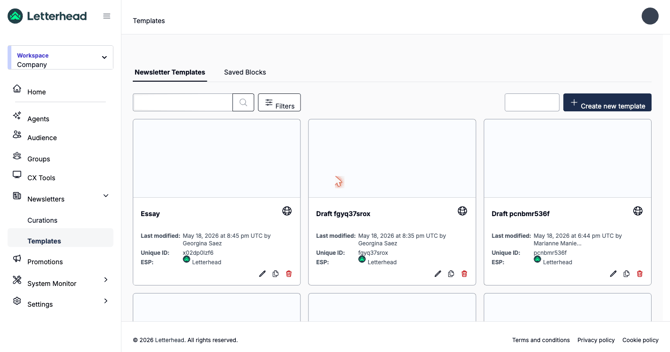
From the left sidebar at the workspace level, click Newsletters → Templates. Then click the template you want to edit.
Step 2: Open the Styles panel
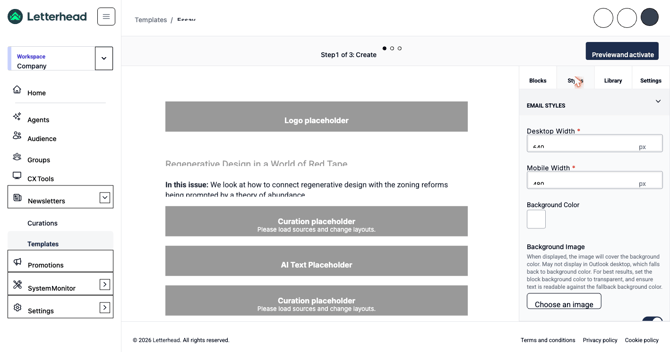
The template editor's right-hand panel has tabs labeled Blocks, Styles, Library, and Settings. Click Styles.
.png?width=670&height=352&name=02-template-editor-blocks%20(1).png)
Step 3: Find the Background Image section
Same place as in the letter editor — under EMAIL STYLES, below Background Color.
Step 4: Upload your image
Click Choose an image and use either upload option (see below). Save the template. Going forward, new letters created from this template will start with this background image. (Letters already created stay as they were — they don't update retroactively.)
Option 3: Add a background image to one section (block)
Use this when you want the background behind just one block — say a hero panel or a featured story — but not the whole email.
This works the same way whether you're editing a letter or a template.
Step 1: Open the editor and select the block
In the editor (letter or template), click directly on the block you want to give a background to. The block gets a blue outline and the right panel switches to Block Settings.
Step 2: Open the Background Image section
In the Block Settings panel, scroll until you see BACKGROUND IMAGE. Click it to expand.
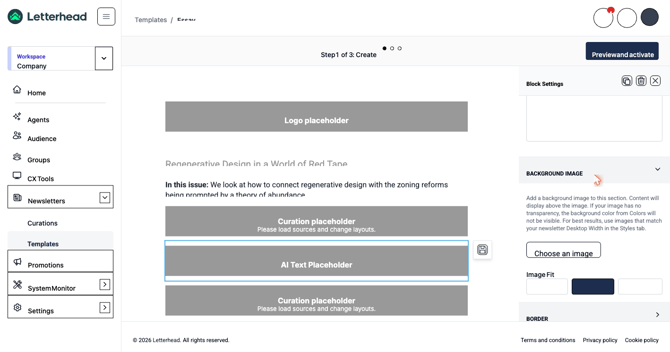
The helper text reads: Add a background image to this section. Content will display above the image. If your image has no transparency, the background color from Colors will not be visible. For best results, use images that match your newsletter Desktop Width in the Styles tab.
Step 3: Click "Choose an image" and pick a fit
After uploading, you'll see an Image Fit toggle with three options:
- Fit — scales the image so the whole thing is visible inside the block (may leave space around the edges).
- Fill — scales the image to cover the block completely (parts may be cropped).
- Tile — repeats the image across the block.
The preview updates as you switch. Save when it looks right.
Upload options (used by all three flows)
Whichever level you're editing, clicking Choose an image opens the same upload window. It has two options on the left:
Local Files — upload from your computer (drag and drop, or click Choose a local file).
Direct Link — paste a URL to an image hosted on the web, then click Upload.
A note about Outlook
Background images may not display in Outlook desktop, which falls back to your Background Color instead. For best results:
- Set your Background Color to something that complements the image — so even Outlook readers see a consistent look.
- If you're using a section-level background image, the description suggests setting Block Background Color to transparent so the image shows through.
Confirm it looks right
Whichever option you used, take a moment to check:
- Can you still read all your text comfortably on top of the image?
- Does the image look right on both desktop and mobile widths?
- Does your fallback Background Color still make sense if the image doesn't load?
When you're happy, click Preview and schedule (on a letter) or Preview and activate (on a template) in the top-right corner to step through Letterhead's preview flow.
Removing a background image
Head back to the same place you added it — Styles tab for the whole letter/template, or Block Settings for a section — and clear the image. It'll fall back to just your Background Color.
Troubleshooting
The image isn't showing up for some readers. Some email clients — most notably Outlook desktop — don't render background images. Those readers see your Background Color instead. Pick a color that still looks great on its own.
Text is hard to read on top of the image. Either swap to a simpler image or set Block Background Color on individual content blocks to a solid color so your text sits on a clean background while the image surrounds it.
The image looks stretched, cropped, or pixelated. For a section background, try a different Image Fit (Fit / Fill / Tile). For a whole-letter or template background, re-upload at a size closer to your Desktop Width in Styles (default 640 px).
I set a background image on my template, but my old letters don't have it. Template changes only apply to new letters created from the template. To add the image to an existing letter, open that letter and set the background image directly on it (Option 1).
Nothing changed after I clicked "Choose an image." The upload may have failed silently if the file is too large or in an unsupported format. Try a smaller JPG or PNG.
Still stuck? Reach out to support and we'll help you get it dialed in.